Sunday, July 31, 2016

Carbon Truss Ritchey-Chrétien

As promised, I have some pictures to share of the new carbon truss RC telescope. It really does look like a work of art. It looks very well built, and as long as I can keep the spiders out of it, it should serve me well for a long time as my long focal length astrograph.

Last month I linked to the Astro Tech truss RC, but those have yet to arrive at Astronomics. I found the same (GSO) scope in stock at High Point Scientific in New Jersey. This is the newest version (3) of the carbon truss scope. The primary cell in v1 was identical to the older solid tube RC scopes which had the focuser hanging off the cell. In v2 they decoupled the focuser attachment, and v3 added a focuser tip/tilt adjustment and a really nice 18 point cell. It also includes a little bracket and thumbscrew to mount a finder scope.

Here is a shot from Altair Astro showing the 18 point primary cell. This is a really nice upgrade from the original GSO RC telescopes.


The guys at High Point were very friendly and assured me that the scope they had in stock was indeed the newest version. A week later, UPS delivered a very big box. It didnt take me very long to open it to see what was inside.


I got her out of the box and made her more comfortable.


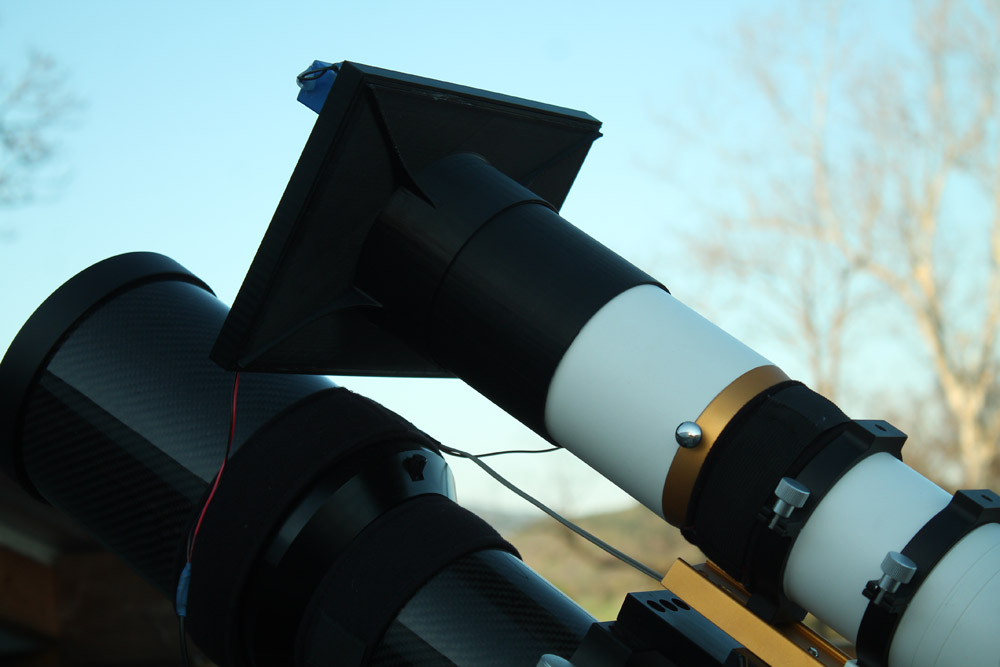
Since I almost always have to image in 100% humidity (yes, really) a dew shield and/or dew heater strip is mandatory. I really hate those floppy dew shields, so I splurged for this really nice bolt on carbon fiber dew shield from Teleskop Service in Germany. It actually arrived a day before the telescope, so I bolted it on to check the fit.

Those really arent my toys. They belong to my 5 year old, Lola. Thats her with her nose sticking out from under the red blanket. She didnt seem at all impressed with the new telescope.
The dew shield fit perfectly. It attaches quickly and easily using two thumbscrews and two bushings that fit into two of the smaller holes in the front ring.


Here's a picture showing the back side of the scope. It comes with three fans to cool the primary mirror, and shows the new solid focuser attachment with tip/tilt adjustment screws, as well as the new finder scope bracket.


It took a little while to get the scope collimated. The primary mirror was off quite a bit. We did get it collimated though and the stars look very nice now. Here's a crop from one sub, magnified 300%.


It took a while to get the new flange to get my Moonlite CSL attached, but its all up and running now. Here's a picture of the scope with the stock focuser in its new home at Little Piney Observatory.....


.....and with the AstroZap shroud installed.


I also purchased the AstroZap dust cover from Astronomics. The scope comes with primary and secondary dust covers, but the primary cover isnt easy to get in and out of the truss structure. I worry about bumping the collimation out of adjustment, so just use the dust cover to try to keep things as clean as I can.


So far I've been very pleased with the scope. NGC 7635, the Bubble nebula, was official First Light for the scope, but the first completed imaged was a quick RGB of NGC 457, the E.T. Cluster. The full size image, as well as all the details and a description of the target can be seen here.

I'm still working to try to finish up the Bubble, but here's what I have so far.


 Hopefully the weather will cooperate with me and I can finish this one, as well as a couple others I am working on. So far I have been using the TSFlat2 field flattener and shooting at f/8 and 2000mm focal length. As soon as I can get these finished, I'm wanting to test out the Astro Physics CCDT67 Telecompressor. I bought the scope mainly for globular clusters and small interesting galaxies, and NGC 7479 is one I have on my radar. Maybe I can give this one a try soon!! :-)

Saturday, June 18, 2016

Orion HDX110 mount (Part 3)

It has been a few months since my last post on the Orion HDX110 (EQ8) mount. I wanted to get this posted in case there was anyone else who bought the mount without the polar scope that was having some similar difficulties.

The mount has been performing great for me of late. I cant pinpoint which was more responsible for the troubles, but adding a counterweight to the side of the mount, and cranking down the clutches super tight seems to have fixed things. I have not had any more problems like I described in my March post.

Counterweight added to offset weight of RA & Dec motors that both hang off the opposite side.

The clutches are tightened using some very small spring loaded levers. You have to tighten things, pull up on them and move the lever back so you can tighten things some more. The tiny levers make it difficult to get things tight enough. Apparently this mount needs them very tight, at least with a heavy load like I pictured in the March post. I had about 60 lbs of equipment and 53 lbs of counterweights on it.

I got this picture from Stargazers Lounge. Some people have removed the levers, and loosen and tighten the clutches using a 1/4" ratchet.


I have not needed to do this, but made sure I got the clutches very tight. Since my mount is in an observatory, I defined a new park position in EQMOD that has the scopes laid over. This allows me to open and close the roof without hitting anything. Also I never need to touch the clutch levers. Just occasionally check them to make sure they are still good and tight, or as my German friends say, gutentight.

I'm really enjoying the mount now. My guiding of late has been fantastic, and I'm looking forward to buying the Astro Tech AT10RCT 10" carbon truss RC. If all goes as planned, I'll be ordering one in a couple weeks, along with the AstroZap shroud and dust cover. Since our weather here in Arkansas is almost always steamy in the summer, I am also planning to get the bolt on carbon fiber dew shield from Teleskop Service in Germany.


Check back here at Little Piney Observatory soon. Hopefully I'll have some fresh pics of the AT10RCT posted, with a review to follow.

Friday, April 22, 2016

The Magic of 3D Printing

I remember seeing a show on the Science Channel some years ago about 3D printing. It did indeed seem like magic to me at the time. They appeared very similar to the CNC machines that I was familiar with, but instead of removing material from a block of aluminum or steel, these things actually build things from a spool of material. Fast forward a few years and now I'm seeing the near limitless capabilities from this wonderful invention.

Charles (Chuck) Hull, co-founder, executive vice president, and chief technology officer of 3D Systems created the first 3D printer in 1983, and he has been refining his invention ever since. This solid imaging process known as stereolithography (3D Printing) is the first commercial rapid prototyping technology that is now available to the masses.

This process has really blossomed over the last few years. There are a few companies now offering personal 3D printers, and I have looked into getting one for myself. Some are very reasonably priced, and you are limited only by your imagination in what you can create. Well, and maybe by the size of your machine, but thats just a minor detail.

I'm lucky enough to know a few guys through my astrophotography hobby that happen to own a 3D printer. In a very short time I have seen just how useful these machines can be. I was reacquainted with the technology about a year or so ago, when some of us were seeing what we described as an "iron cross" artifact on bright stars when imaging with our William Optics Star71 telescopes. Some examples of the scope are worse than others, and the problem seemed to be worse in cold weather. A couple of the guys made a simple aperture mask that slipped over the dew shield and it seemed to fix the problem.

My friend Josh Smith sent me one of these to try out on my scope, and the results were clearly better with the aperture mask in place. My scope as delivered was much better than some I had seen, but I still did not like the artifact. You can see the difference it made with these test shots on the star Vega.

5 second luminance, without aperture mask

5 second luminance, with aperture mask
Josh later took this a step further. The dew shield of the Star71 is very short, so he incorporated a removable mask inside of an extended dew shield. The aperture mask snaps in and out for those wishing to only use the aperture mask on cold nights, when the artifact is much worse, but take advantage of the extended dew shield year round.


Another nice touch is the bahtinov focus mask. I prefer to just leave the aperture mask/extended dew shield on the scope all the time, so he even made a dust cover for me.


mask/shield w/bahtinov focus mask
Dust cover
If you've been following along, you know that Little Piney Observatory was lucky enough to get a new equatorial mount a couple months ago. I now like to keep the Star71 piggybacked on the TS 107mm triplet, but this presented a slight problem when it came time to take a set of flats for the little scope.

I have found the longer I can expose the flats, the better results I see. I also like to place at least one sheet of plain white paper on the scope, and lay the light directly on the scope with it pointed at zenith. To do this on the Star71 using my Spike-A flat fielder, this meant removing the dew shield of the 107mm and sliding the Star71 forward so the light could lay across both telescopes. This was a bit more hassle than I wanted to fool with, so I contacted my friend Josh again to see if he might have a remedy for this situation.

What he later sent me was the perfect solution. Using his 3D printer, he fabricated a frame around the light panel that slides directly over the dew shield. When in use it easily clears the dew shield of the 107mm, and the light came with a dimmer switch. Problem solved! I was also told that he's currently working on a USB controller for the light panel. You know that I'll be calling him to see when that will be ready!


Needless to say, he has one happy customer here at Little Piney Observatory. If you have some similar needs, or just a idea in your mind, get in touch with Josh. He's an engineer by trade, and shares my love of the night sky and astrophotography. You can get in touch with him through his website at www.catchingthecosmos.com. Be sure and check out some of his amazing images while you're there.

Some other neat things to come from 3D printing are these ringed standoffs from my friend Tony Akens. These simple rings work great for keeping wires out of places they dont belong, and also make a convenient place to tie off other wires when not in use.


Tony is another great guy that just did some upgrading to his 3D printer. He says he's looking into other cable routing ideas, and I'm wondering what he will dream up next! Tony is a regular on the Cloudy Nights forum, and anyone wishing to contact him can do so here. You need to be a member of Cloudy Nights to contact him there, so if you aren't already a member, be sure and sign up today. Its free to join and there's a wealth of information there. Another plus from being a member is 5% off any purchase from the forum sponsor, Astronomics!

Enjoy the warmer Spring nights while you're out under the stars, and be sure to let me know about the 3D printing ideas you've dreamed up. If its top secret, I'll understand, you can trust me. ;)

Clear skies, and happy imaging!

Thursday, March 31, 2016

Growing Pains

The new mount outlined in my last post has turned into a love-hate affair. It can certainly carry more weight than my Atlas Pro, and when it works, it works very well. I've seen the guiding perform just as well with the new mount carrying 60+ pounds, compared to the Atlas Pro carrying about 25 pounds. After having two months to work with the new mount, I think I've had it long enough to write an unbiased review, and discuss what I believe to be a design flaw in the EQ8/HDX110 mount.

The main problems that I'm seeing stem from, in my opinion, both the RA and Dec motors hanging off the west side of the mount (as seen in northern hemisphere with mount pointing toward Polaris).

First of all, I need to say I did not buy the polar scope that hangs off the opposite side of the mount. From what I can tell, the brackets look to be fairly thick and heavy, and these brackets combined with the polar scope itself, could balance the mount. As it is now, I can balance RA to be quite a bit east heavy, and when I release the counterweight shaft, it will fall down to about a 30 degree angle before the weight off the motors cancel things out. When I say "quite a bit east heavy", I mean very east heavy compared to what I've always done with the Atlas Pro and CGEM DX mounts. I'm afraid to go any further with it. This graph sums up what I've been seeing at times. It seems to always occur in this "dead zone" pointing east where the weight of the motors cancels out the weight of the counterweight(s). It also happens right after flipping meridian. I can move the counterweight down the bar after the meridian flip and it stops happening, but guiding is not nearly as good.


I first tried to go about things by offsetting the scopes to the east a little. I bought an ADM side-by-side saddle and loaded up the mount with my 10" Meade SCT, TS 107mm, and WO Star71.


It worked reasonably well most of the time, and then I'd see RA taking off on its own. First one direction, and then the other. When this starts happening it usually takes me an hour to get in a single 10 minute exposure. It gets very frustrating as you might imagine.

Apparently this is nothing new to EQ8/HDX110 owners, because I ran across these images in Stargazer's Lounge showing what others have done.


Since these dont show the polar scope attached, it really makes me think the weight of the polar scope and brackets hanging off the side balances things out. I really dont see any other reason a polar scope would be mounted in this fashion. I question its accuracy mounted in this configuration as well. I will try something as pictured above and report back. Again, when it works, it works great, and should allow me to buy and use a larger carbon truss RC that I have been wanting.

Guiding with 0.29" rms total error
 At least its warmer now with Spring in full swing here. I'm hoping to get this nailed down soon and purchase a new large aperture scope for imaging. Hopefully it happens soon, because I otherwise really do like the mount. Wish me luck, and happy imaging everyone!

Sunday, January 31, 2016

New Year Upgrades

It's been a little while since I've posted here. Part of it has been the normal cloudy winter weather here, another part has been some downtime for some upgrades. What better time for upgrades than while it's cloudy though, right?

The first thing we did here was finally getting that ethernet cable cable ran out to the observatory. I have to say, it has been really nice using Remote Desktop from the warmth of my room here in the house. Being able to keep a check on things, or making adjustments to the guiding, without walking out into the cold weather has already made the digging worthwhile. Not to mention the numerous other good things that come with having internet in the observatory.

It was about 180 feet or so out to the observatory from the corner of the house. Thankfully it didnt need to be buried that deep, and we ran the CAT5e cable in some 1/2" pvc conduit.

Merry Christmas to me! :)


Internet is nice, but we want to see to see some new astronomy gear, right? Well, it was supposed to be a new camera, but the Starlight Xpress Trius 694 I bought just didnt work out for me. Soon after buying the camera, I ended up selling my 8" RC to a friend in the Houston area. I have always wanted to go to a larger RC.

Well, it isnt a new larger RC....yet. I feared my Atlas Pro couldnt handle a 10" RC, so with the camera refund, along with the money from the sell of my 8" RC, I decided to go ahead and get the mount I wanted to buy months ago, the EQ8. Or more specifically, the Orion branded HDX110.

Before I could install the mount on my pier, I needed a new pier adapter. I ended up contacting Dave Yates at TPI (Telescope Performance Improvements) in Canada. Dave specializes in custom machining and makes everything from custom pier adapters, to tripod spreaders, battery trays, tripod leg levelers, and several upgrades for CGE, EQ6, and CGEM mounts.

His website is www.tpiastro.com and I'd highly recommend Dave to anyone. He's a super nice guy and his work is top notch.

I had the Starizona pier adapter that I used for both my CGEM DX and Atlas Pro mounts. Dave knew exactly what I had and machined a new top for my Starizona pier adapter. I could not be happier with how it turned out.


Once the new pier topper was in place, it was time to get the beast mounted. I bought the mount only, minus tripod and counterweights. I ended up buying the 21 lb and the 11 lb Losmandy counterweights from Astronomics. These are made for the Losmandy G8, G11, and Titan mounts, and have a 1.25" bore. A perfect fit for the HDX110 mount.


With the new mount back on the pier, I put the Teleskop Service 107mm triplet and the trusty SBIG STF-8300 on the mount and it was time for a test drive!

As I'm typing this, the first night of testing is wrapping up. It has gone well after a few bumps in the road getting started. Guiding has been running between 0.50" and 0.65" with terrible seeing conditions. This isnt too bad for a first night out, all things considered.

I'll continue to work with this combination a while and try to get things fine tuned before galaxy season kicks off this spring. With a little luck, I'll have a new long focal length scope sitting on top of the new mount in a few months. I still havent decided for sure just yet what that scope will be, but with a mount that is capable of carrying 110 lbs, my choices have just expanded greatly!